Dental veneers, often called laminates, are wafter-thin custom-made shells of tooth coloured dental materials designed to cover the front surface of the tooth. Made form ceramic or resin composite materials, veneers are often used to improve the appearance of a tooth or to prevent the tooth’s surface from damage.
These shells are then bonded to the front of the tooth and can be colour matched to the other teeth, as well as adjusting the shape and size. Ceramic veneers resist stains better than resin veneers and better mimic the light reflecting properties of natural teeth.
For a smile makeover that lasts, it’s important to visit your cosmetic dentist and consider the options from master ceramists in ceramic crowns, veneer procedures and thin shells for root canal treatments. With the right care, you can have a beautiful, natural-looking smile that will last.
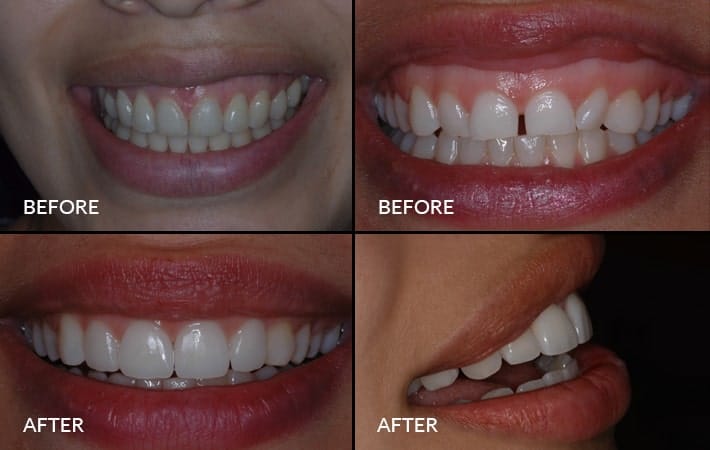
What can veneers fix?

Discoloured teeth

Worn down teeth

Chipped or broken teeth

Misaligned, uneven or irregularly shaped teeth

Gaps between teeth
What does the Procedure Involve?
Applying a dental veneer requires three trips to your prosthodontist. The first trip is a simple consultation and the following two are to create and apply the veneer.

Step 1 – Diagnosis and treatment planning
The first step involves your active participation where you explain to us the result you are trying to achieve. During your first consultation, we will examine your teeth and make sure that dental veneers are your best option. We may need to take x-rays and create impressions of your mouth and teeth to fully examine your unique situation. We may also suggest Digital Smile Design as part of the treatment planning stage.
Step 2 – Preparation
To prepare your tooth for a veneer, we will need to remove a very thin layer (approximately 0.3mm) of discoloured tooth enamel from the surface. This will be replaced with a veneer of the same thickness. Local anaesthetic is often not necessary, though we will assess the need during your first consultation. Next, we will create a stone model of your teeth using a special mould or an impression, which we will then send to a dental laboratory that will specially create your veneer. This process often takes 1-2 weeks, though for very unsightly teeth, temporary dental veneers can be placed at no additional cost.


Step 3 – Bonding
Before the dental veneer is permanently cemented, we will temporarily place it to your tooth to examine its colour, shape and size. Next, your tooth will be cleaned and polished to allow for a strong bonding process. We then bond the veneer to your tooth using special cement and evaluate your bite to make sure your restored beautiful smile is perfect.